Friday, January 27, 2012

Daring Baker January 2012: Scones (aka Biscuits)

Audax Artifex was our January 2012 Daring Bakers' host. Aud worked tirelessly to master light and fluffy scones (a/k/a biscuits) to help us create delicious and perfect batches in our own kitchens!

Quick clarification from the challenge - being a North American girl, the treat we made this month were biscuits - our host was Australia, where the same tasty treats are called scones. That said, I wouldn't have found this month's challenge very unusual/ challenging if it weren't for all the information and tips that Audax provided in addition to the basic recipe. I appreciate the time host put into researching how small differences in performing different steps in the recipe make differences in the final product, and all the work that went into creating the recipe we used.
For the challenge, I went with basic biscuits, no additions, because I expected to make more than one batch in the month, but my outside obligations ended up with other plans. The substitutions I made to the provided recipe were using Earth Balance Non-Dairy butter, and soy milk.
I put the butter in the freezer, first, and this step really helped with getting to small chunks of butter - it was much easier to work with. Next, I triple sifted the dry ingredients together, then added the cold butter to that. Because the butter was already in chunks, and I wanted more control over the mix, I used my hands to get to the size I wanted - the goal was flaky biscuits.

Frozen butter in dry ingredients
Larger chunks of butter mixed in for flaky biscuits.

Next I added the liquid, and worked with the dough on a floured cutting board. The dough was very wet, and I would have found a second set of hands useful, if only to take pictures and to flour things (the cutting board, the dough, hands, etc). One thing I neglected to do was to get out all the tools I needed before I began, and I ended up washing my hands free of dough several times as I realized I needed to fetch something else from one drawer or other. I think this is definitely a lesson I should be applying to all my baking endeavors - set out all the tools you need, in addition to all the ingredients, before you begin.

A very wet dough.

Added some flour to keep my hands from sticking.
I kneaded the dough the fewest times I could, in order to prevent the dough from getting tough. I pressed the dough out, and realized I didn't have the biscuit cutters out, so I just used a knife to cut them into quasi-squares. The dough was so wet, though, that they ended up being more of a drop-biscuit than any defined shape.


Biscuits, pre-baking.

It was a messy process, but delicious results

Once the biscuits were out of the oven, I enjoyed three of them warm, for breakfast. The result was a very delightful, light and buttery biscuit. I look forward to trying the variations that were provided, and making up my own, and I know that armed with all of Audax's hard earned information that I should have great success with those, as well.

Out of the oven - nice and golden.

Cooling.

Soft and flaky.

With raspberry preserves- a delicious breakfast.
New tools/ ingredients:  pastry scraper
Recipes used
:  Basic Scone (a.k.a Basic Biscuits) - provided by Daring Baker challenge
Co-bakers:  solo mission
Date: January 14, 2012

Wednesday, January 18, 2012

Banana Crumble - January 15, 2012

As happens occasionally, I found myself with several quickly ripening bananas. Rather than eat the sweeter fruit, or toss them, I decided to look for recipes which called for ripe bananas. I thought I would end up with a bread or muffin recipe, but in looking through my cookbooks, I found one for Banana Crumble in The Joy of Vegan Baking, and decided to try that one.
The recipe calls for either individual ramekins, which I do not own (yet) or a 9" pan, which I do. The recipe itself was pretty easy. Sliced bananas went into sugar, then those went into a lightly oiled pan. The three bananas I ended up using weren't quite enough to fill the bottom of the pan, but I got a fairly good spread.
Very ripe bananasBananas in sugarNot quite enough to cover the bottom.

The crumble topping was a simple mix of ½ a cup each of 5 ingredients (oats, flour, brown sugar, non-dairy butter, and toasted coconut), mixed together, and spread over the bananas, then sprinkled with nutmeg. The hardest part was toasting the coconut, and I didn't keep close enough an eye on it, and it came out browner around the edges of the pan.

Holy Toasted Coconut, Batman!For the crumbleCrumble top

 The entire crumble baked for 20 minutes. The smell of warm Banana Crumble was amazing, and once it was sufficiently cool, I helped myself. The crumble didn't slice it, well, crumbled onto my plate. The result was a delicious, sweet treat, which I really think would be wonderful a la mode.
Nice and warm. A sweet treat.

Definitely keeping this recipe as a delicious way to use up any excess over-ripe bananas.


New tools/ ingredients: Toasted Shredded coconut
Recipes used:  "Banana Crumble", pg 133 from Joy of Vegan Baking
Co-bakers:  solo
Date: January 15, 2012

Sunday, January 15, 2012

Moving forward

I am a great dreamer, a great planner, a great "it would be cool if one day..." kind of gal. In January 2009, on a trip with two of my girlfriends to Denver, we came up with one of those fun ideas.

Wouldn't it be cool to open a bakery in our home town that offered a duel menu - items offered baked with traditional recipes and again in vegan form.

Conversations continued, ideas came and went, and when we got back to Florida we were still excited. Still bandying ideas back and forth - how would the kitchen have to be set up? Perhaps with an open window so our patrons could see it. We started meeting once a week to bake.

The first year we took turns picking recipes and hosting baking night. Somewhere along the way, my house became the default kitchen. As time passed, I started accumulating vegan cookbooks in addition to crazy amounts of ingredients, though occasionally we would still work with a recipe from online, or adapted from a non-vegan cookbook.

In January 2010, I turned 33. Thinking about it, I wasn't sure what I wanted to do with my life (and am still not). I also realized that this dream bakery, which I had grown fond of the idea of, had real danger of being one of those dreams you hold on to, and halfheartedly pursue, but never commit to doing. I also knew that if I half-assed it there was a chance that I would clutch onto this idea as a safety net, and allow myself to not consider other dreams. Because, well, I already had one I was (sorta) working towards.

I liked the idea of this bakery too much to let it suffer that fate. So, on my 33rd birthday, I set a deadline for myself. I would have two years to research and plan and putter around to my hearts content, but on my 35th birthday I would have to decide one way or the other. I would either commit to doing it, and start on the real steps to get my dreams off the ground, or would set the dream aside, nod my head in acknowledgment of how cool an idea it was, but concede I would never actually do it.

Basically, I wouldn't let this dream get stuck in "wouldn't it be cool if" limbo.

So I continued to bake with my friends and alone, though not as frequently as every week. I enrolled in a local college and earned a certificate in Entrepreneurship and Small Business Management. I did brief research on local regulations, including the newly passed cottage food industry law (which means I can sell certain products from my home, without needing a certified kitchen). I took three Wilton cake decorating classes, and signed up for the fourth one the first time it's offered (next month). I talked with bakery owners from other cities, signed up and participated in online Daring Baker challenges, had marathon baking days making Christmas presents this year, and sold my first cake. This past week I researched and visited five farmers markets and spoke with vendors to get their opinions on that scene.

And even though it is still two weeks from my birthday, I have decided that I am going to go ahead with this dream.


I'll start small, at a farmers market, using that as a chance to see if it is viable as a business. And if that works, I'll either stick with it, or look to the next step.

So over the next few weeks, I'll be writing a business plan and looking at what are the necessary next steps— registering a business name, making a webpage, figuring out packaging and labels, and most importantly, coming up with a menu and figuring out what I can manage for a farmers market while still working a full-time job.

As I came to the conclusion to commit to this dream — slowly over the last month (really, it has been longer, but has definitely been more definitive as my deadline drew near) I've start to feel overwhelmed. But I remind myself the even baby steps move me forward and I can afford to look at one small thing and get that done, working towards the big picture. Each step, no matter how little, is a step towards realizing this dream.

Thursday, January 12, 2012

Vegan, Gluten-Free Raspberry Cheesecake Brownies - Jan. 11, 2012

For this week's baking night, we continued on our venture to make yummy baked goods for our friend who has gone gluten-free for the month. We started with the Gluten-Free Raspberry Cheesecake Brownies recipe found on Serious Eats website. While the recipe was Gluten-Free, we had veganize it.

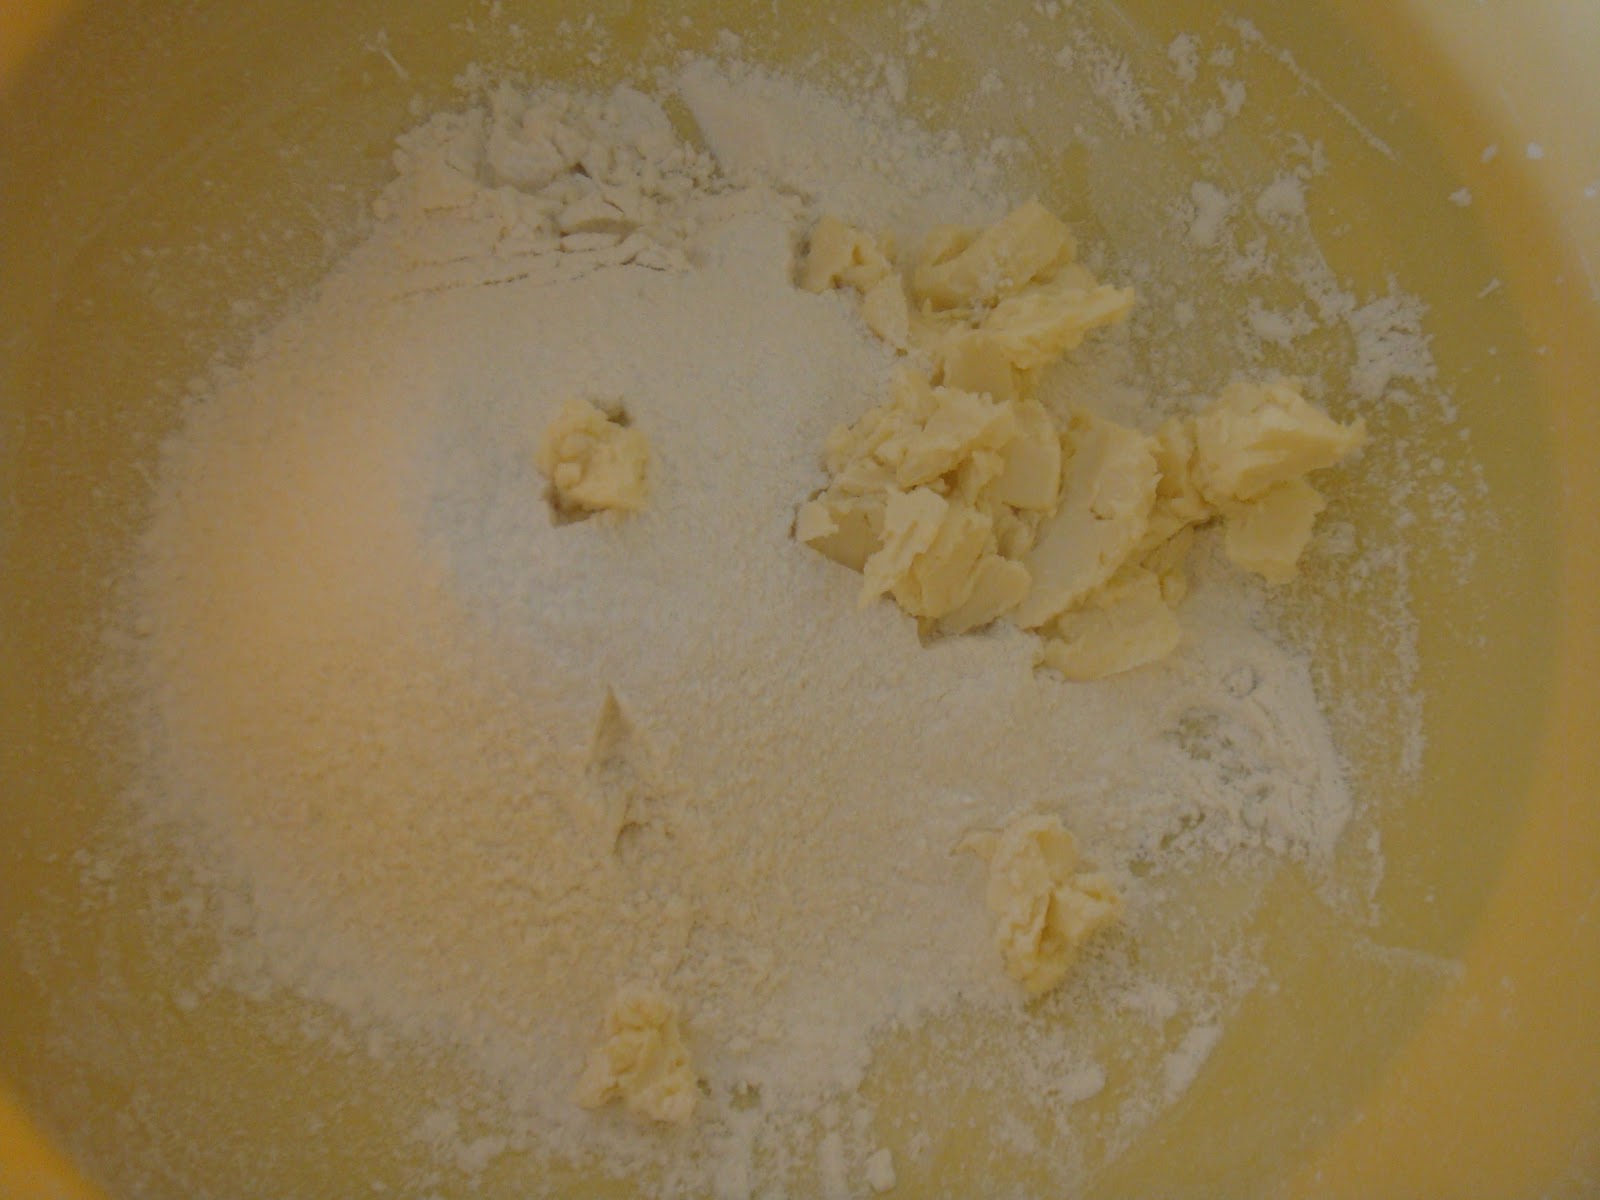
Once again Lila brought over a variety of gluten-free flours, and we worked with ingredients in the house.

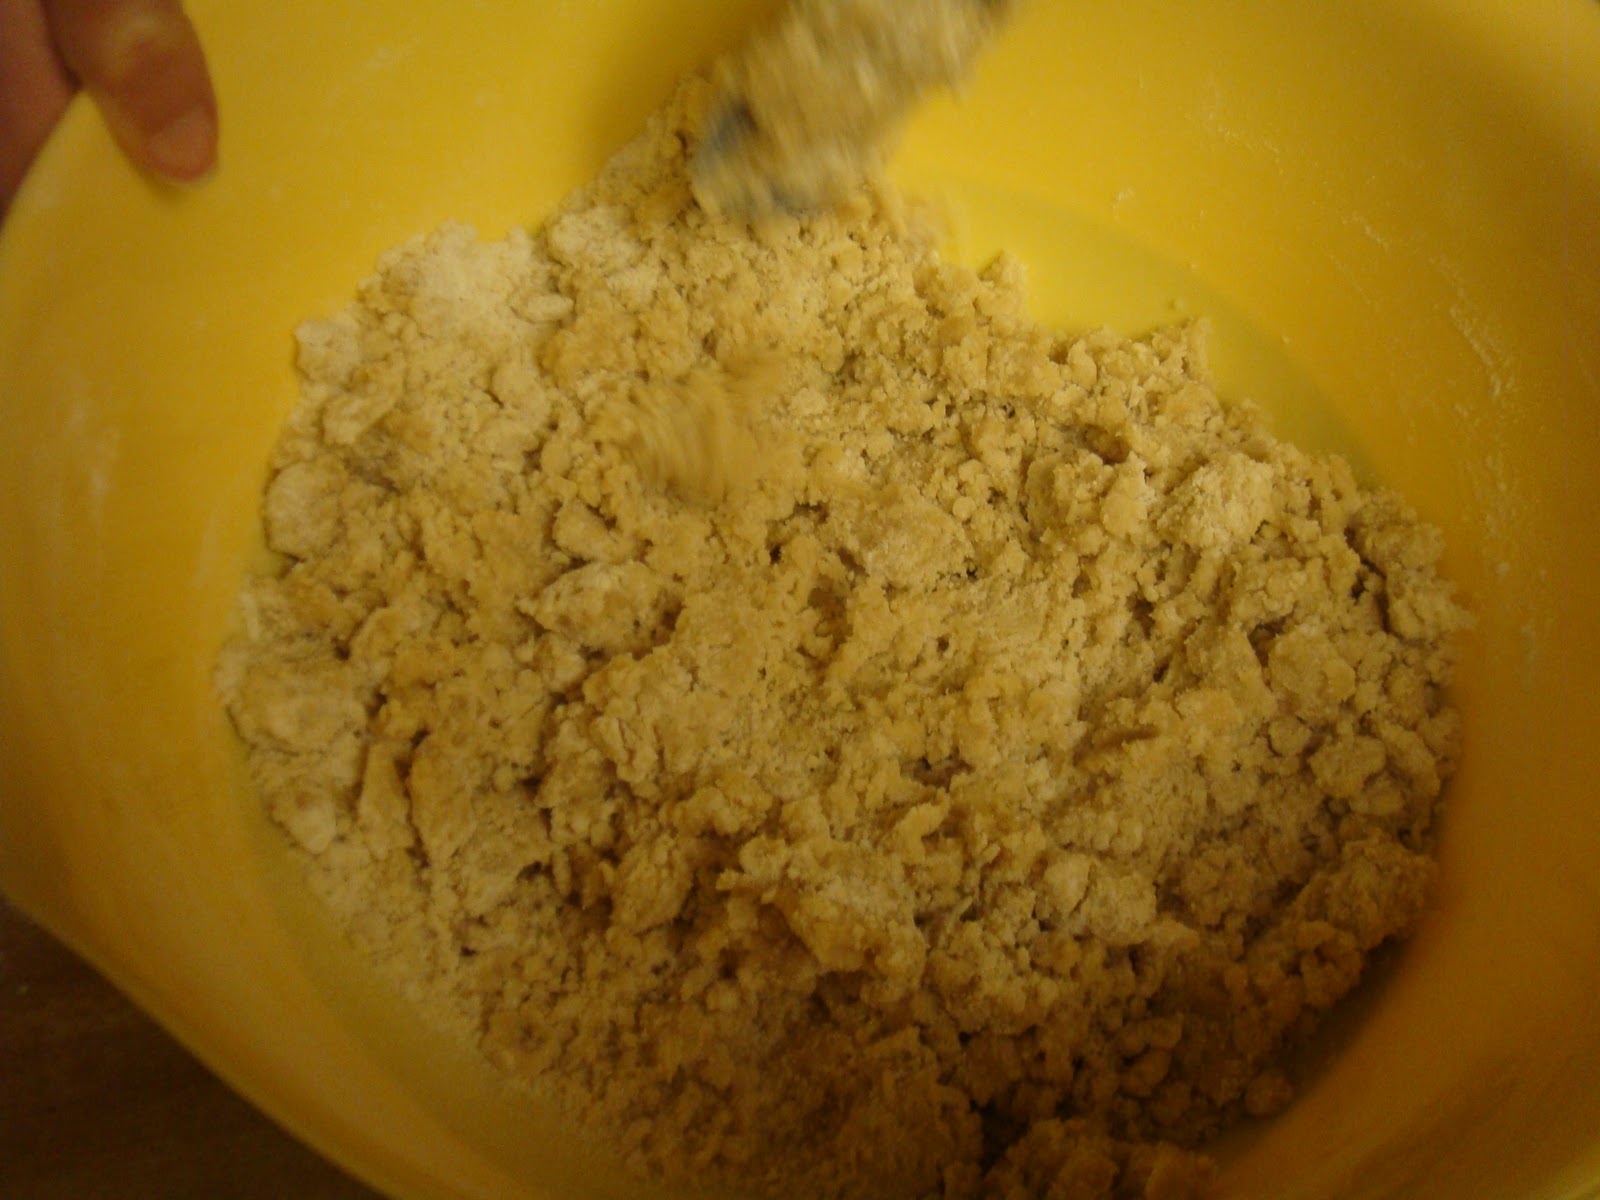
Lila mixed the dry goods, and I worked on blending the non-dairy butter with the sugar. The brownie recipe called for four eggs in the base. We opted to replace this with two flax seed eggs, and two Ener-G egg replacer eggs. When the brownie base was done, the batter was a lighter color and thicker than I expected it to be. It held together very well, however.
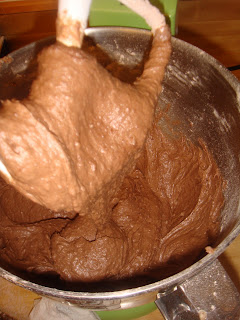
Nice thick brownie batter.

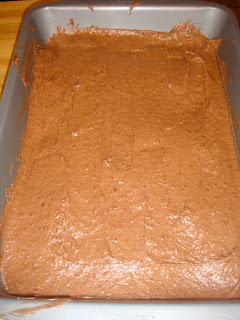
Getting the batter to spread was the hardest part.
 
For the topping we used Toffuti Better than Cream Cheese, and replaced the egg with two tablespoons of soy yogurt.

Cheesecake topping on the brownie batter.

The raspberry jam we used had been refrigerated, and it made it hard to spread the dollops in with the cheesecake topping. We ended up using our (thoroughly cleaned) fingers when utensils failed us.
Giving the dessert a raspberry. Or raspberry jam, at least.

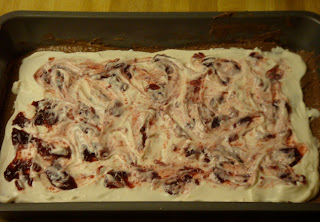
We finger-painted to get the swirls, since the jam was cold.
 The recipe called for the brownies to baked "until cheesecake toping is golden brown and brownie base is set." Referencing a series of other brownie recipes, we determined to start with 30 minutes, then add time from there.

The first time we checked on the brownies, the entire pan contents wiggled. We added another 10 minutes. Still too liquidy. Another 5 minutes looked better, but the brownie base in the middle was still damp. An additional 5 minutes, which put our baking time at 50 minutes total. 
The brownies were too soft to eat, and the evening was well over for a work night. I let the pan cool, then covered it in foil, and put it in the fridge, delaying our taste-test until this morning.
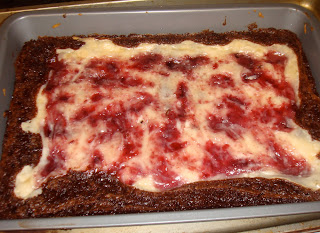
Out of the oven.
These brownies are delicious. The brownie edges are a little chewy, but not in a bad way. The base is fudgy, not cake-like. This means the brownies are flatter than I expected. Now, I am more of a cake-like brownie girl, so I found the texture a little different. Lila, on the other hand, is a fudgy brownie girl, and the texture I noticed as being different / possibly a problem was one of the things she liked about these brownies.
I am including the adapted recipe below:


Vegan, Gluten-Free Raspberry Cheesecake Brownies

These brownies bake up dense, extra-fudgy and moist due to the cheesecake and jam topping.


Brownie Base:
1 cup white rice flour
½ cup sweet rice flour
½ cup cocoa powder
½ teaspoon salt
¼ teaspoon xanthan gum
8 oz. (2 sticks) non-dairy butter, softened
2 cups granulated sugar
4 TBSP milled flax seeds (2 eggs worth)
1 TBSP Ener-G Egg replacer (2 eggs worth)
10 TBSP warm water, separated
2 teaspoons vanilla extract

Cheesecake Topping:
⅓ cup granulated sugar
2 TBSP plain soy yogurt
8 oz non-dairy cream cheese, softened

Raspberry Swirl:
⅓ cup raspberry jam, room temperature

1. Preheat oven to 325 F. Grease a 9X13 inch pain.
2. In a medium mixing bowl, combine the white rice flour, sweet rice flour, cocoa powder, salt and xanthan gum.
3. In a small bowl, mix whisk together the flax seeds, and 6 TBSP of warm water.
4. In a separate small bowl, whisk together the Ener-G egg replacer and 4 TBSP of warm water.
5. In stand mixer with paddle attachment, cream together butter and granulated sugar.
6. Mix in half the flax-seed mixture.
7. Mix in the egg replacer mixture, stopping mixer and scrapping down sides as necessary.
8. Add vanilla extract, mix until combined.
9. Add whisked ingredients a little at a time, blending between additions. Once all dry ingredients are added, blend until a thick batter forms.
10. Spread batter evenly into prepared pan.
11. For the cheesecake topping: In a small bowl, cream together non-dairy cream cheese and sugar until thick.
12. Add soy yogurt. Mix until smooth.
13. Pour topping evenly over brownie batter.
14. Dot raspberry jam evenly over pan. Using a knife or clean fingers, gently swirl raspberry jam through cheesecake topping.
15. Bake until cheesecake topping is golden brown, and brownie base is set (this varies by oven - it took us 50 minutes).  A knife inserted in the center of the pan should come out clean with a few crumbs clinging to it.
16. Allow brownies to cool before cutting into squares.

New tools/ ingredients:  none
Recipes used:  "Gluten-Free Raspberry Cheesecake Brownies" from Serious Eats - adapted
Co-bakers:  Lila
Date: January 10, 2012

Monday, January 09, 2012

Kitchen Supplies - Post-Christmas update

As I have moved forward with the idea of opening a vegan bakery, my friends and family have caught on to my enthusiasm for being in the kitchen, and for kitchen equipment, both functional and novel. Over the past year, I have added many gadgets to my kitchen supplies, including some of those listed in my February 2010 wish list.

My  kitchen now boasts a candy thermometer, a handheld mixer (courtesy of my mom), cupcake stencils (from my sister), a temperamental digital scale, and cake decorating supplies purchased in pursuit of the 4 Wilton Cake Decorating courses (I begin class 4 - Advanced Gum Paste Flowers -  in February).

For Christmas this year, many of my gifts also fell into a kitchen theme, to my delight, and I just wanted to take a moment to share the wonderful things that my awesome friends and family got for me.

My parents got me many utensils for my kitchen. The ones that will be most useful for my baking (and for serving my baked goods to my willing friends and taste testers), are a brownie spatula, a pie server, and a pastry scraper.


Additionally they sent me a set of five nesting bowls, which are actually dry measure cups, each with a smaller amount denoted by a line, and a larger amount encompassed by the whole bowl. They are, from smallest to largest: 1/8 Cup and ¼ Cup ; ¼ Cup and ½ Cup ; ½ Cup and 1 Cup ; ¾ Cup and 1 ½ Cup ; and 1 Cup and 2 Cups measures.


Both my husband and myself received novelty cookie cutters, and we can now enjoy ninja-bread men, and ginger-dead men.


My mother-in-law was surprised to see how delighted I was at receiving the set of mixing bowls she gave me. These sleek nesting bowls have a pour spout, a coated grip handle, and a grip-bottom which prevents them from sliding when using a mixer. Also, they are an awesome color palette.


I received a neat set of matryoshka doll designed measuring spoons, in ¼ tsp, ½ tsp, 1 tsp, ½ TBSP, and 1 TBSP measures, each with a different design on the back from a friend. 


Finally, my parents also got for me two books, Vegan Pie in the Sky, and The Complete Guide to Vegan Food Substitutions. This has rounded out my collection of vegan baking books nicely. 
 

 I am thrilled with the gifts I received, and cannot wait to share my baked goodies with the friends and family who were so generous with me.

Saturday, January 07, 2012

Gluten-Free Chocolate Chip Cookies - Jan 4, 2012

In researching vegan baking, I came across another growing trend / allergen awareness, which is gluten-free. I've been wanting to try my hand at a gluten-free recipe for a while now - I even bought Babycakes cookbook in anticipation of trying to incorporate gluten-free into my baking repertoire.

One of the limiting factors for me with the gluten-free recipes in this book, and from other sources, was the use of flours I had never purchased, and honestly wasn't sure how to find them or how frequently I'd use them in my baking as a whole, given my sporadic schedule. So I put my experimentation with these recipes and flours on the back burner.

Then, at the turn of the new year, Lila's boyfriend began trying out a gluten-free diet for health reasons, and Lila generously brought over a large variety of non-glutenous flours to the first baking night of the year. This was a perfect opportunity to test one of the recipes, and to make something sweet that we could share with her boyfriend (a long standing taste-tester) as well.
 
We were without means to get to the grocery store, so we flipped through cookbooks and websites trying to find a gluten-free recipe for which she had the right flour, and I had the rest of the ingredients on hand. Unfortunately my stock of applesauce was out, and while she had many non-gluten flours, somehow we ended up an absence of the combinations of flours called for in the Babycakes recipes.
 
We finally settled on adapting the "Better For Ya Chocolate Chip Cookies" recipe in Lickin' the Beaters 2 since it called for "3 cups gluten-free flour" with out relying on specific types. We opted for a blend of flours, 1 ½ Cups of brown rice flour, 1 Cup white rice flour, and ½ Cup sweet rice flour.
 
The recipe called for ½ Cup brown rice syrup, which we had to substitute for granulated sugar, as it was the only missing ingredient. Switching out a liquid for a solid sweetener left the dough not forming together, so we added more oil and maple syrup, in turns, to increase the liquid. We ended up adding 2 additional TBSP of canola oil, and 3 additional TBSP of maple syrup in order to get the dough to hold together at all. If we were to make the substitution again in the future, I would either consider a different liquid sweetener (I readily have agave nectar, light corn syrup and dark corn syrup on hand) instead of sugar, or adding more maple syrup, but not as much additional oil, as the end cookies were slightly oily for my taste.
 
Dough - a bit dry without liquid sweetener

Even with the additional liquid, the dough did not really stick together, and Lila speculated this may be the nature of the brown rice flour, which made up half our flour blend. We were able to form cookies by hand, though we had to press them together in order to make solid shapes.
 
Even with extra liquid, still crumbly.
We baked the first batch for 12 minutes, the longest the recipe called for, and while the cookies looked done, they were kind of pale. We left the second tray in the oven for 14 minutes, and they achieved a bit more of a golden color.
 
Cookies at 12 minutes

Cookies at 14 minutes, a bit more golden.

The cookies were sweet, and I could definitely taste the maple syrup. They ended up softer / more crumbly that my traditional cookies, but this texture was one of the things that appealed to my husband, and Lila's boyfriend both.
 
Overall, our first foray into gluten-free baking went well, and though we would make different choices if and when we try this recipe again (like having the right sweetener, or experiment with a different blend of flour), I think this effort was a success.


Adapted Recipe (what we made): Gluten-Free Chocolate Chip cookies


1 1/2 cups brown rice flour
1 cup white rice flour
1/2 cup sweet rice flour
1 teaspoon baking soda
1 teaspoon baking powder
1/2 cup granulated sugar
1/2 cup and 2 Tablespoons canola oil
3/4 cup and 1 Tablespoon maple syrup
2 teaspoons vanilla
1/2 cup semi-sweet chocolate chips

1. Preheat oven to 350 F. Line two cookie sheets with Silpat or Parchment paper.
2. In a large bowl, mix dry ingredients except chocolate chips.
3. In a small bowl, wisk wet ingredients together. Mix wet into dry. Once mixed, add the chocolate chips.
4. Form balls by hand, and flatten onto cookie sheet. These cookies do not spread much.
5. Bake for 12-15 minutes. Let cool for a few minutes, then transfer to wire rack to cool.

New tools/ Ingredients: brown rice flour, white rice flour, sweet rice flour; new mixing bowls
Recipes used:  "Better for Ya Chocolate Chip Cookies" pg 124, Lickin' the Beaters 2: Vegan Chocolate and Candy - adapted
Co-bakers:  Lila
Date: January 4, 2012

Tuesday, January 03, 2012

Daring Baker December 2011: Sourdough Challenge, Russian Rye Bread

Our Daring Bakers Host for December 2011 was Jessica of My Recipe Project
and she showed us how fun it is to create Sour Dough bread in our own kitchens! She provided us
with Sour Dough recipes from Bread Matters by AndrewWhitley as well as delicious recipes to use
our Sour Dough bread in from Tonia George’s Things on Toast and Canteen’s Great British Food!

One of the hardest things about this challenge for me was the timing. With travel to a mid-month wedding, I ended up having to start making the dough at home, and carrying it with me to and from Christmas at my in-laws house, a four and a half hour drive away. Because of this, I didn't really get any pictures of the process, but I do have some of the end product.

Of the three recipes provided, I opted for the Russian Rye bread because of the time needed to make the dough, and for taste. Personally, I don't like sourdough bread, but I'm always up for a challenge.

The first several days of the recipe included adding rye flour and water. Unfortunately I didn't read the recipe closely, and didn't realize it was supposed to be warm water until the third day. Because of this, and the timing with the holiday, I did an extra day of adding flour and water to the starter mix.

Day six had me make production sourdough with the starter, and a lot more water and flour. The final day I made a dough using this production sourdough (I ended up using the whole thing, as somehow I ended up short of the 2 1/2 projected cups), more flour, salt and water. The dough went in a pan, and then was allowed to rise one final time.

The dough was more runny than most bread doughs I've worked with, and it didn't rise as well as I expected, but this could be due to several factors, including the flour I was working with (rye, not dark rye), the water temperature, and my impatience to get the bread in the oven.

The bread baked for an hour, and after more than a week, I finally had bread.

Russian Rye Bread
The bread didn't rise much.
Easy as...

The second requirement for the Daring Baker Challenge was to make a recipe that showcased the bread. I used one of the provided recipes, Garlic and Oregano Roasted Mushrooms on Toasted Sourdough, and served it as a snack on New Year's eve.

The toppings for the bread included red onion, mushrooms, garlic, fresh oregano, olive oil, salt and pepper, roasted, and placed on top of toasted, buttered (Earth Balance) sourdough. I smelled the vegetables before they were done, and I knew this was going to be a great dish. It was a little hard to eat, since the onion slices were so large, but I think the flavors really went well with the sourdough bread. My sister assured me the bread tasted like a sourdough should, though I still personally find this kind of bread bitter, and so I'll probably be throwing out the remainder of my starter, rather than using it again.

Toppings before bakedOut of the oven

Garlic and Oregano Roasted Mushrooms on Toasted Sourdough

New tools/ ingredients:  Rye flour
Recipes used:  from Daring Baker Challenge
Co-bakers:  solo mission
Date: December 21-31, 2011

Thursday, December 15, 2011

Holiday Baking - Round 1

This year we decided that for Christmas we're only doing gift shopping for our family, and that for everyone else whom we normally get gifts (friends, co-workers, group members, etc) that we would give them baked goods.

My first round in the kitchen was Sunday, baking treats for co-workers (both mine and my husband's) and my writer's group. I picked 5 recipes to work with, all of them from The Joy of Vegan Baking. The first thing I did was write down the ingredients I needed for each recipe in an excel table, listing by gram (for solids) or ML (for liquids), and create a formula to multiply the number of recipe batches I was making of each (3 of one, 1 recipe worth of another, and 2 batches of the rest). I made my shopping list from there, then hit the grocery store.

I read through the recipes, and came up with a baking order, and planed to do some of the baking on Sunday, and some on Monday, as both holiday parties I was attending were on Tuesday. I ended up making everything in a massive baking session that lasted through 4 movies which I put on in the background [ Ever After, Ella Enchanted, High School Musical and Mulan if anyone is interested- all movies I had seen before, so great choices for background noise, but little attention required].

I started off with some prep work. I toasted the pecans I needed for the recipes, as well as zesting an orange and lemon, and juicing the orange. With these ingredients prepped, and all the remaining ingredients for all the recipes brought out to the counter where I could access them quickly, I set to work.

I made a triple batch of Pumpkin Spice Bread first, each batch making 4 mini-loafs. In retrospect, I should have either made three separate batches, or made a double batch followed by a single batch. It was a bear to mix the ingredients (ended up splitting them between my largest mixing bowl, and the bowl from my stand mixer), and 3 batches made 12 mini-loafs, which I put in the oven all at once. This probably slowed the heating, as the two cookie sheets the loafs were on took up the entire space on the shelf. Ah, hindsight. The loafs are for immediate co-workers, my massage therapist, and two neighbors.

While the mini-loafs were cooking, I cleaned up, and started making the batter for a loaf of the Cranberry Nut Bread. I made this recipe 2 times over the Thanksgiving season, so I felt pretty confident with it. The mini loafs came out of the oven, and the single large loaf went in. This bread is my contribution to the holiday snacks at our writer's group workshop/holiday party.

While the bread was in the oven, I started making a double batch of Caramelized Pecans AKA Pralines. I almost mis-measured the butter for this recipe, forgetting to double it like I had the rest of the ingredients. Actually, I worried about this a lot when baking, since I was making double or triple sized batches of most things. Note to future self: either make the batches separately, or copy the recipe with the doubled measurements to work from. I managed to scoop the pralines out onto the buttered wax paper just before the bread had to come out of the oven, so my timing was pretty good in this case. The only problem was the mix was sticking to the pot, but when I was scooping it out, it was too runny. Instead of discrete praline pieces, I have two sheets of pralines that I need to navigated. These were originally intended to go to extended co-workers, though they may end up being a holiday party food, if I can't make pretty / even pieces.

Next up were Chocolate Mint Chocolate Chip cookies, double batch. Another old favorite of mine from the cookbook, so again, I wasn't too worried about the execution of the recipe. I used the ½ TBSP measuring spoon to make even sizes, and kept the cookies small. The cooking time on these was low (10-11 minutes), and I ended up falling behind and the first tray was out of the oven before the second tray was ready to go in. Same for the third and forth trays. These cookies came out well, and pretty even in size. Any note I would have would be to get a better spoon (easier to get the dough out of), or find another way to get uniform size that is quicker (perhaps roll and chill the dough to enable slicing?). These cookies are for everyone - immediate and extended co-workers, writer's group members, neighbors and my MT.

Last up was a double batch of Mexican Wedding Cookies. I ended up having to grind the pecans for this recipe, as I forgot to prepare these in advance. I used my food processor rather than the manual nut grinder, though, so this step went pretty quickly. My stand mixer was finally called to use in making the dough for these cookies, and I used the same measuring spoon to scoop out balls of dough for the tray. Baking time on these was 30 minutes, so I managed to complete the second tray worth by the time the first batch finished baking, but only just. Again, a different spoon may be the answer, here. Once the second batch went in the oven, I rolled the first batch (still warm) in powdered sugar, and finished clean up while the  second batch cooked. These cookies are also for everyone on our list.

After the marathon day of baking, the only thing I have left to do tonight is to separate the cookies (and possibly Pralines) into some of the decorative holiday bags and boxes, and maybe put bows on the mini-loafs, which are in holiday tins that came with their own lids. Then a small break, evaluating recipes, and next week I start again, making treats for our friends.

New tools/ ingredients: Pumpkin Puree; my own candy thermometer (yay)
Recipes used: Cranberry Nut Bread - pg 61; Pumpkin Spice Bread - pg 65; Chocolate Chip Mint Cookies - pg 112 ; Mexican Wedding Cookies - pg 14 ; Caramelized Pecans (Pralines) - pg 197 ; all from The Joy of Vegan Baking
Co-bakers:  solo mission
Date: Dec. 12, 2011

Thursday, October 27, 2011

Daring Baker October 2011: Povitica

The Daring Baker’s October 2011 challenge was Povitica, hosted by Jenni of The Gingered Whisk. Povitica is a traditional Eastern European Dessert Bread that is as lovely to look at as it is to eat!

I adapted the recipe that Jenni provided, opting to work with the quarter batch (single loaf) recipe due to time constraints. I measured out all the dry ingredients the night before, mixing the ones I could (for instance the sugar, flour and yeast), and set the aside. The goal was to come home, make the dough as quickly as I could, and let it have the full hour and half to rise before Allyson came over.

Since the filling we were working with was walnut based, I opted to go with flax seeds/ water to replace the egg in the dough and filling.  I also reduced the amount of salt in the recipe as the Earth Balance non-dairy butter I use is salted, and the recipe calls for unsalted.

While the yeast activated, I scalded the soy milk. I'm not certain that this was a necessary step with non-dairy milk, but since I don't have a lot of experience with bread, I figured it couldn't hurt.

Top, clockwise: melted butter, salt / sugar mix,
yeast/ flour/ sugar/ water - active, flax seed/water mix.
I mixed the rest of the ingredients for the dough into the milk, adding the flour by increments until the dough was cohesive enough to pull from the bowl. I ended up adding a lot more of the flour as I kneeded the dough, but eventually got it to the point it was a soft ball.


Dough ingredients and first batch of flour.
More flour made it thicker, like a soup.
Getting better - the dough is pulling away from the bowl.
Final result - smooth dough ball, kneeded and soft.

I placed the dough in an oiled bowl, with plastic wrap and then a towel over it, and put the whole thing in my oven and waited for Allyson to come over. My timing was off, however, and once she came over, we ended up waiting another half hour, then starting the filling before the dough was done rising.


Mixed with milk and butter.
Dry ingredients for filling.


The filling, a mix of walnuts, sugar, cinnamon, cocoa, soy milk, butter, flax seed / water mixture (to replace the egg), and vanilla. The end product reminded me a bit of granola, though it smelled like a very yummy oatmeal breakfast.


Using the PVC pipe we purchased to roll out the phyllo dough for the challenge a few months back, we rolled out the dough. Once it was large enough, we pulled it over our hands to make it thin. This went faster / was easier because there were two of us. Also, the Povitica dough had less elasticity than the croissant dough, and kept it's stretched-out shape more easily.


Stretching the dough. More stretching. Four hands are better than two.


We covered the dough with melted butter, then spooned on the filling, and rolled the dough over it. The result was reminiscent of a very lumpy burrito. We looped the dough into a greased bread pan, tucking the sides in, buttered the top (I don't like coffee, and so omitted it from the recipe) and set it in the oven to bake.


Filling spread on the dough.
Rolled, and coiled in the pan.

The house smelled divine after half an hour, and when an hour was up (15 minutes at 350F, and 45 minutes at 300F), the bread looked pretty good too.


Finished Povitica.
We decided to share our bounty with friends on Friday, and since we only have one loaf, I haven't taste-tested it yet. I'll report back as to how it came out, but I'm excited by this recipe, and see great potential for it for breakfast bread.

New tools/ ingredients:  none
Recipes used:  from Daring Baker Challenge
Co-bakers:  Allyson
Date: Oct 25 and 26, 2011