Sunday, February 27, 2011

Daring Baker Feb 2011: Panna Cotta & Florentine Cookies

The February 2011 Daring Bakers’ challenge was hosted by Mallory from A Sofa in the Kitchen. She chose to challenge everyone to make Panna Cotta from a Giada De Laurentiis recipe and Nestle Florentine Cookies.

For my second Daring Baker challenge the main recipe was dairy based - generally easier to veganize than the egg whites from last month, but once again I was slightly stumped, having never had to replace heavy cream in a recipe before. And although I've not had to replace gelatin in a recipe yet, I still had the bar agar-agar and the xanthan gum from the last DB challenge experiments.

One of the other alternate bakers posted a vegan version of Panna Cotta, and looking at the substitutions, it looked like something that I could have eventually come to, and looked like it would be more of a success than I could achieve by trial and error. For the milk, I substituted a mix of coconut milk and vanilla soy milk, and for the heavy cream, we used (firm) silken tofu.

Since the dessert was in two parts, and we generally get together to bake on a week night after work, we decided to split the two recipes over two consecutive nights. Allyson joined me the first night, when we made the Panna Cotta, which had to set for at least 6 hours before eating, and then Lila joined us the following night for making the Florentine cookies.

WEDNESDAY:

We mixed the coconut and soy milk and sugar over heat.


 Next we blended the firm silken tofu and the vanilla in the food processor.

Then wisked both together and filled the glasses, moving them into the refrigerator to set. I didn't do a very good job of cleaning the edges after ladling in the Panna Cotta, and I was surprised at the lack of actual yield. We filled 3 glasses just over half full, and I had hoped to save some for the top of our gelée layer, but it was quickly clear that there just wasn't enough.

Milk and tofu combined. Our Panna Cotta.Three Panna Cotta in the glasses.

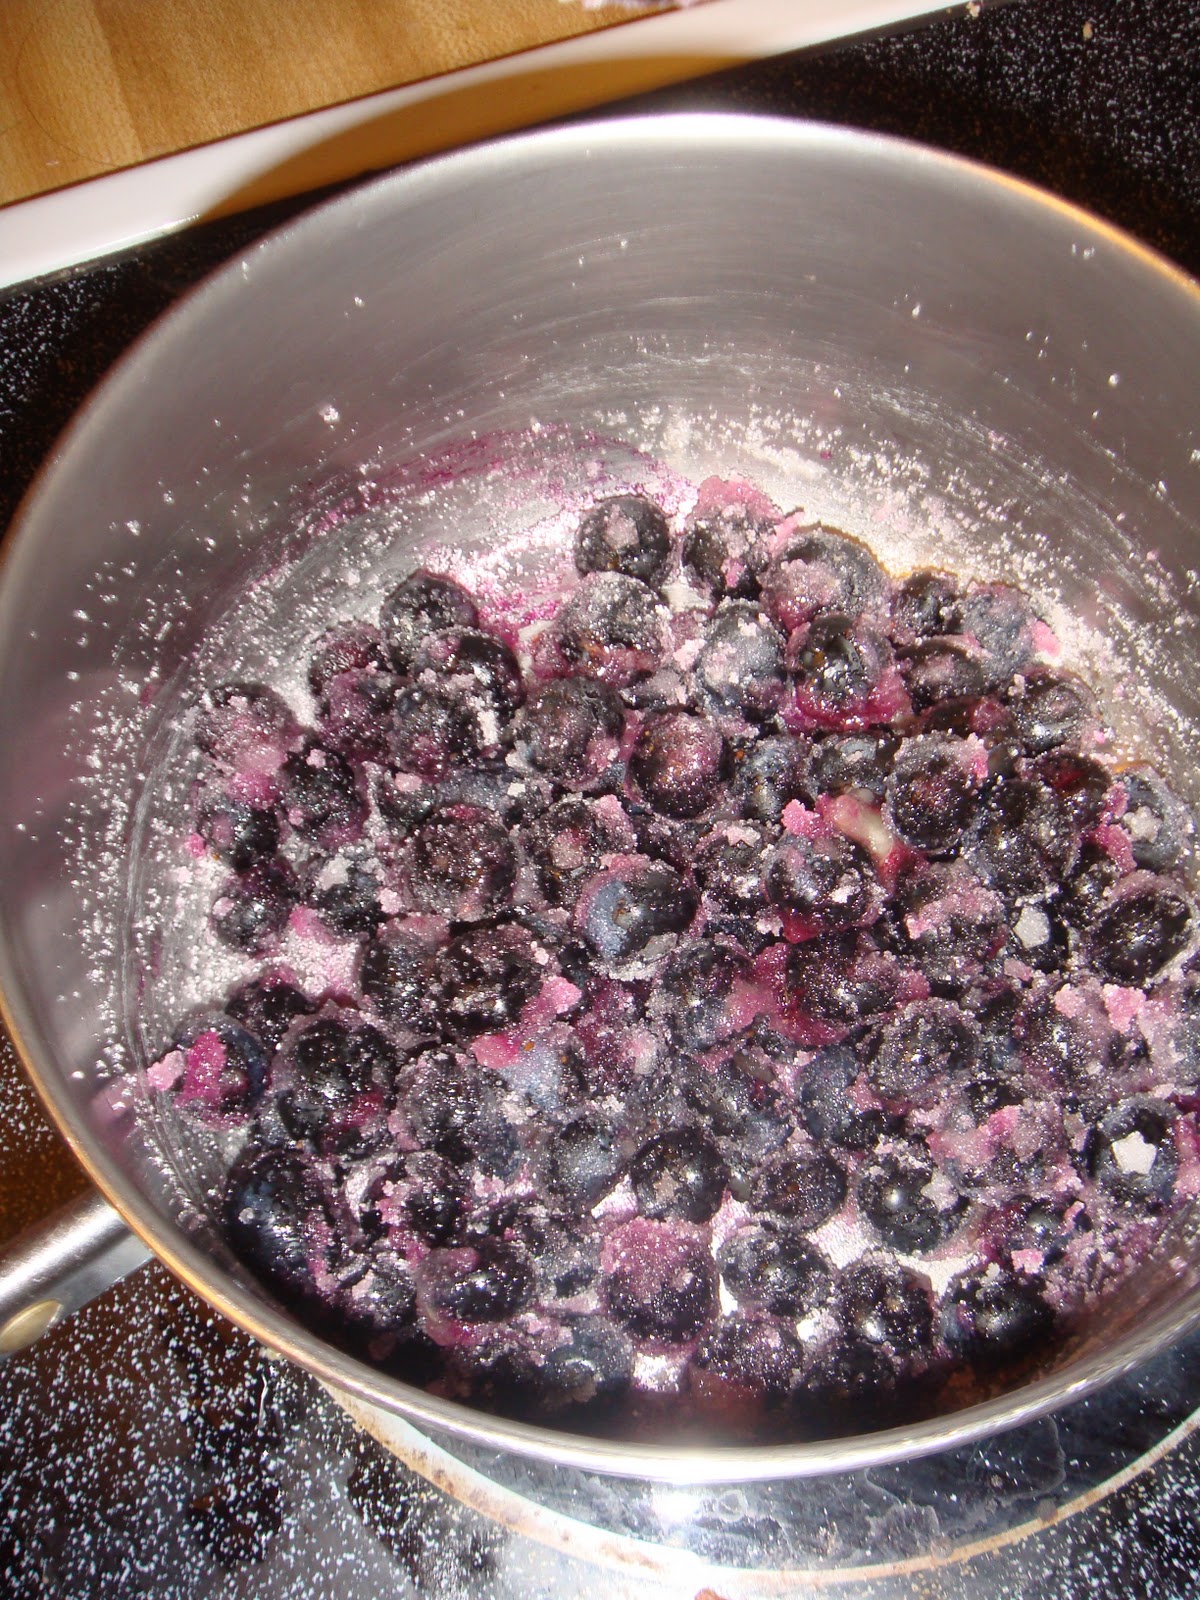
Blueberries in sugar 1.
Blueberries in sugar 2
Sugar has disolved
Added water and agar combo.
Getting mushy.
Our gelee.
While the Panna Cotta cooled, we moved on to make a fruit gelée – we chose blueberries. The first step was to mix the fruit with sugar over heat. At first we were discouraged because it didn't really seem to be doing anything. While Allyson kept stirring the berries, I measured out the agar-agar (which I had flaked myself from the bar, not having flakes on hand) and added that to water.

The amount of water to agar seemed too low, so I added more water.

Agar-agar flakes in water.


When the berries finally started macerating correctly, and the sugar was all but invisible, we added the water and agar-agar mix to the blueberries, and stirred. It took a while for the agar to dissolve, but it finally did. We then put the mix in the fridge to cool, and finally, when it was not hot (parts were still warm, but Allyson had to go home, so we forged ahead anyway) we added the berry gelée to the top of the panna cotta, and put them back in the fridge to wait until the next day.


Panna Cotta with Gelee


THURSDAY

The recipe for the Florentine cookies was easy to veganize, substituting earth balance non-dairy butter and soy milk. For the chocolate filling we used a mix of non-dairy dark chocolate (from a bar) and non-dairy semi-sweet chocolate chips.

These cookies reminded me very much of the oatmeal cookies that Alison and Lila tried to make in an earlier baking attempt, but apparently these cookies were supposed to spread and end up thin. We had a slight problem with getting the right size for the cookies, but we finally got the hang of it.

Our first batch going on the cookie sheet.First batch - way to wide. These guys spread a lot.

Smaller second batch.More reasonable size.
The cookies ended up being very lacy, and when we tried to add chocolate to them, to make sandwiches, we ran into a problem. We gave up on that, and settled for non-chocolated cookies. We did get one batch right out of the oven that we managed to roll (out long enough to not burn our fingers- much, but still warm enough to be pliable). These we dipped into the melted chocolate later. I didn't get a good picture of these, unfortunately.


Adding chocolate.Correction, making a mess with chocolate.
 
Rolled cookies
After too many batches of cookies (very frustrating to only be able to bake them 6 at a time, even when working with two cookie sheets, and they bake for 6-8 minutes. I felt like I was at it forever) we finally settled in for our taste test.

VERDICT:

Consensus on the cookies was that they reminded us of granola bars- especially those first messy attempts to add chocolate to them. Later tasting proved that if you are going to store them, make sure to put wax paper between the cookies, and they get very crisp when they've had a chance to really cool.

The Panna Cotta was interesting. The blueberry geléegelée to Panna Cotta, or if we should have blended/ smashed the berries rather than using them whole. In any case, I wasn't a great fan of the results.

The Panna Cotta itself was a nice texture, and I was surprised to find the coconut flavor wasn't as strong as I expected. Overall the dessert was pretty thick, and we each only ended up eating half. If we make this again, it will definitely be in smaller glasses.


New tools/ ingredients:  coconut milk ; agar-agar flakes; cookie scoop, dark corn syrup, 
Recipes used: Vegan Panna Cotta from DB alternate baker forum; Fruit Gelée and Nestle Florentine Cookie from DB challenge
Co-bakers: Lila, Allyson
Date: Feb. 23 and 24, 2011

Thursday, January 27, 2011

Daring Baker Jan 2011: Biscuit Joconde Imprime

The January 2011 Daring Bakers’ challenge was hosted by Astheroshe of the blog accro. She chose to challenge everyone to make a Biscuit Joconde Imprime to wrap around an Entremets dessert.

Allyson and Lila were excited when I told them about the challenge, and so we rolled up our sleeves and set to it. Based on our trials with replacing egg whites, we made the following adjustments.


Joconde Sponge

Original RecipeVeganized Recipe  
3/4 Cup almond flour3/4 Cup almond flour
1/2 Cup + 2 TBSP confectioners' sugar1/2 Cup + 2 TBSP confectioners' sugar
1/4 cup cake flour1/4 cup + 2 TBSP cake flour
3 large eggs3 tsp Ener-G Egg replacer in 4 TBSP water
3 large egg whites½ tsp xanthan gum in  ½ cups water
½ tsp baking power
2 ½ tsp granulated sugar2 ½ tsp granulated sugar
2 TBSP unsalted butter2 TBSP non-hydrogenated non-dairy butter

Patterned Joconde = Decor Paste
Original RecipeVeganized Recipe  
14 TBSP unsalted butter14 TBSP non-hydrogenated non-dairy butter
1 ½ cups + 1 ½ TBSP confectioners' sugar1 ½ cups + 1 ½ TBSP confectioners' sugar
7 large egg whites (~200 grams)½ tsp xanthan gum in  ½ cups water  
1 ¾ cups cake flour1 ¾ cups cake flour
food coloring gelfood coloring gel


We decided to use the mouse from our trial run, adding a bit of sugar and orange extract, as part of the filling. Realizing that we'd need a sturdy base, we made a simple vanilla cake (from a cupcake recipe) adding some orange zest for flavor. We used almond milk in the cake to tie the flavors together with the almond flour in the main recipe.


We made the cake first, along with 9 cupcakes - we wanted a lower cake for the base. It turned out much nicer than our trial sponge cakes, and we were thrilled.


As the cake cooled we made the decorating paste, using xanthan gum and water to replace the egg whites at half the volume called by the recipe (in grams). I have a new kitchen scale and using it saved the recipe. The paste called for X sugar at Y grams. I decided to scoop the sugar into the bowl with the butter, and use the weight to get the exact amount, instead of relying on my measuring cups. It was supposed to be a bit over 3 scoops with the ½ cup measure that I had on hand. I'd reached the weight after 2 scoops. We realized my mistake then - I'd used granulated sugar instead of confectioners sugar. We removed the sugar, some of it slightly buttered, and started again - to better results.


We decided on orange and pink for the decorating paste, as we were decorating the top with orange and strawberry slices. We tested piping out the paste, and then spreading it and drawing lines in the paste with a fork. Ultimately we decided to do vertical stripes of orange and pink, and run a fork through horizontally to get a cross-hatched look. We spread the paste on the silpat about ¼ inch thick across the board. We realized too late that this was too thick, and we could not separate it with the fork, and we resigned to just having the color stripes.

Trial with Decor Paste1/4 inch thick - too much for adding lines


The Joconde batter said it was supposed to make enough for 2, but with our adjustments to veganize it, it just barely covered the back of the cakey- paste. We put it in the oven and I set to blending the sugar and orange extract into the chocolate mouse.

The Joconde Sponge was barely enough to cover the colored paste.


The cake at 8 minutes didn't look done, and we added on a bit more time. Then the first smoke detector went off. I pulled it off the wall, hit the stove-hood blower and opened a window as Allyson and Lila took the cake out of the oven. The second smoke detector went of, and my hubby got up and asked what was going on as he removed the battery. I opened the back patio door for a chilly cross breeze. In the end we figured it was some of the edge pieces that burned.


The post smoke detector Joconde.


Wrapping the spring form pan ring with plastic wrap and lining it with parchment paper proved to be a lot harder than it looked. We cut the Joconde in half, unsure how high it needed to be to accommodate the cake and mouse, and started to put it in the pan. The second piece stuck to the parchment paper and was mushy on the bottom - perhaps not cooked enough. We put it in the ring and discussed the next step. 


Into the form.
The Joconde slowly started to collapse.


Allyson and I scrambled to hold it in place while Lila grabbed the cake base, quickly trimming it to put in the pan. We sued strips around the edge to fill in spots where it was too narrow. Next the mouse went on, and then we trimmed how tall it would be. It was crumbly, and we realized why the recipe says to cut it first.

In goes the cake...... topped by chocolate orange mouse.


We also realized that if we hadn't had such a thick layer of the decor paste, the edges could have been a lot worse. The "cake" part of the Joconde did little to hold it together in our case, and resulted in a cracking side.


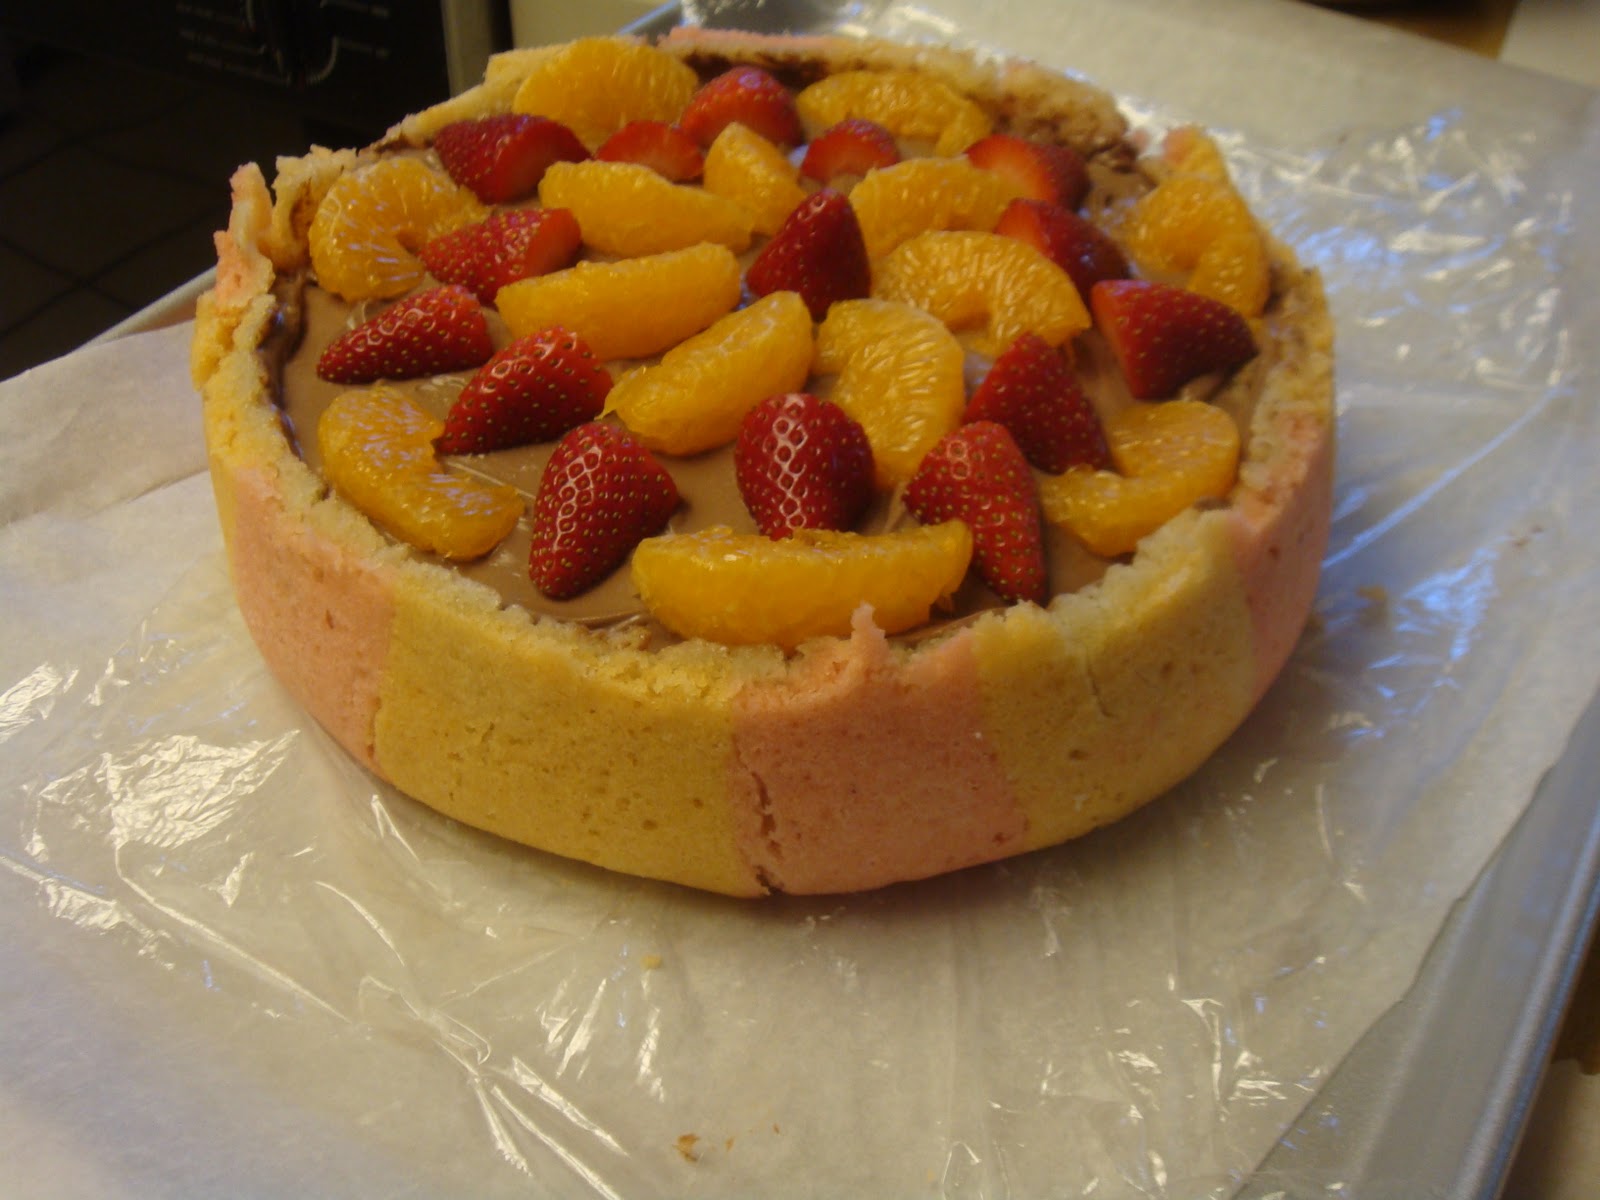
We decorated our treat with strawberries and tangerine slices, and the top looked pretty, and on side looked good, but the other was sort of a crumbly mess.
All together, it tasted pretty good.

The finished product.

The back.


If we were to do this again, we would definitely let the Joconde cool more before trying to put it in place. We would also get the plastic wrap and parchment paper more securely in place, and play with the Joconde cake recipe some more so it doesn't end up a smoke detector  aggravating mushy in parts mess.


And weed trim the cake more, and early in the process. We decided mouse did not have enough of it's own solidity, and it was to our benefit that our Joconde wrapper was so thick, it prevented the mouse from pushing the sides out too much.

Delicious.

New tools/ ingredients:  Silpat, almond flout, cake flour, kitchen scale
Recipes used: Vanilla Cupcakes and Chocolate Mouse from Joy of Vegan Baking, Joconde Sponge and Decor Paste from Daring Baker challenge
Co-bakers: Lila, Allyson
Date: Jan. 22, 2011

Friday, January 07, 2011

Cherries and Cream Pie

In mid-December the topic of baking came up with my girl friends, and we decided to reestablish a weekly baking night in the new year. We parted for the holidays and when I came back I made my new year shopping run - mostly to stock our kitchen, but one of the extras that was on sale that I picked up was cherries.

I told the girls about my find - I thought the would be good for baking, and Allyson (note: this is not the same Alison with whom we originally started baking - she has moved to be near her fiancé) jumped right in and found many recipes that called for cherries. We settled on Cherries and Cream Pie. We did make a few changes to veganize the recipe (non-dairy butter, Tofutti Better than Cream Cheese, Ener-G egg replacer and vanilla soy milk).

We decided the easiest way to pit the cherries was to use halves instead of wholes in the recipe, letting us pull the pit out once we sliced around it.

Slicing these cherries left us red-handed. Literally.
Lila measured and mixed the crust ingredients, Allyson mixed the cream cheese topping and I made the egg then scuttled around the kitchen getting things and putting things away as we were done with them.

We greased a 9.5 inch glass pie pan, and in went the batter. I had fun placing the cherry halves in the yellowy base, and spooning the topping over them.

Batter with cherries...... and after the topping was added.

 Because of then nature of the pie, a toothpick in the center was not going to ever come out clean, so we had to go by sight, and let the pie bake for 30 minutes.


Finished, and cooling.
The recipe says to serve slightly warm or chilled, but we were anxious to try our creation, and after only half an hour I served up 3 "slices" - the cream topping was like warm pudding, and after serving our portions, I put the pie in the fridge to prevent loss of the rest of the topping into the void made by our missing pieces.


A messy, but delicious, "slice" of the still-warm pie.
The cherry and vanilla flavors went well together, and we were surprised at how fluffy the bottom "crust" came out. All in all a successful evening of baking and as Allyson pointed out, it is amazing how much faster (and how much more fun) baking with friends is over baking alone.


New tools/ ingredients:  vanilla pudding mix
Recipes used: Cherries and Cream Pie from bakingbites.com
Co-bakers: Lila, Allyson
Date: Jan. 5, 2011

Sunday, December 19, 2010

Gingerbread Cupcakes with Lemon Buttercream Frosting

I recently purchased my own copy of Vegan Cupcakes Take Over the World, so when the staff holiday party came around with its potluck element, I decided to pull out the mini-muffin pans and make something from my new cookbook for the occasion.

With my sister's help I decided on the Gingerbread Cupcakes with Lemon Buttercream Frosting. The challenge ended up being the great ingredient hunt.

By a strange twist of fate (shopping at a Farmer's Market and looking up what I'd bought in my friend's copy of The Flavor Bible for compatible spices) I ended up purchasing ground ginger from our kitchen specialty store a few months ago. It has sat, unused, in my pantry since. That was the easiest of the new ingredients to find. Light molasses I found quickly in the baking aisle of my local supermarket. Two down.

With some assistance gained at the customer service counter of my local Publix, I finally located crystallized ginger, in the "ethnic food" aisle, with the Asian cuisine. The same gentleman also helped me discover that while the mart did carry soy yogurt, it only had strawberry flavored. Also, the store was out of mini-muffin pan liners - I'd have to rely on what I had left at home.

On my way to the checkout I called home and ask them to call the Fresh Market which is literally across the street from the Publix, to see if they carried soy yogurt. No, they did not.

I went home and called different Publix locations around town - from past experience I know that they sometimes stock different items - indeed, one location carried the same brand of soy yogurt as my local store, not only in strawberry, but also in... peach. I don't want to even try to imagine what either of those would do for the flavor of gingerbread cupcakes.

My final call was to Mother Earth market, and I was thrilled that my quest was coming to an end. They carried both plain and vanilla soy yogurt - in many different brands.

Finally home with all the ingredients, my sister helped measure things out as I chopped up the crystallized ginger, and zested and juiced the lemons. I ended up with 25 small muffin pan liners for my 24 muffin pan spaces, but too much batter - so the extra went into 5 large cupcakes.

We baked the miniatures first - they required only about 10 minutes, while the full sized ones took 20 minutes.

Mini-cupcakes cooling

I made the buttercream frosting while they baked. One oddity - the recipe calls for lemon zest, but the instructions don't mention when to add it, so I added it with a few stirs at the end.

My Lemon Buttercream Frosting was very lemony, but didn't preform so well on the "cream" side. The answer is obvious - I dreaded cleaning the beaters from my electric mixer so much that I beat the frosting by hand. This obviously affected the amount of "fluff" my frosting achieved.

Lemon buttercream frosting - not fluffy, but still delicious.

After the cupcakes cooled sufficiently, I iced them, and found my frosting didn't spread as well as I would like - lesson learned about skimping on steps.

I took one of the mini-cupcakes for my taste test. What I learned is that I don't like ginger, or molasses, or perhaps the combination of the two. At the end of the day, this is  not the recipe for me.

Regardless, I made a second batch the next day for my immediate co-workers (with 200+ people at the large staff party, none of them had a chance to try my cupcakes.) It wasn't until I had the oven pre-heated, and most of the ingredients mixed that I realized I was short 1/4 a cup of the required 1/2 cup of maple syrup. I checked my pantry and did a quick substitution, mixing half pancake syrup and half agave nectar to make up the missing volume.  Admittedly, I did not sample this second batch, as they were all full-sized cupcakes, but my co-workers gave the confection a thumbs-up.

Larger cupcakes with frosting.

Overall, I learned a lot making these cupcakes, and I'm glad I tried them, but I really don't see making them again.

New tools/ ingredients:  light molasses, crystallized ginger, ground ginger, soy yogurt
Recipes used: Gingerbread Cupcakes from Vegan Cupcakes Take Over the World pg 53 ; Lemon Buttercream Frosting from Vegan Cupcakes Take Over the World pg 96
Co-baker: sister
Date: Dec. 6-7, 2010

Saturday, December 18, 2010

Holiday Fruit Bars - Dec. 2010

Growing up my mom made her holiday fruit bars every year - batches for our teachers, for the exterminator, for parties, and of course a stash to have around the house. For me, I knew Christmas was coming when the fruit bars were being made. A few years ago we hosted Christmas at my house, and I made the fruit bars - my husband's mother and grandfather both clamored for a copy of the recipe before they left.

Since then I have not gone back to the recipe, but this year I decided that with all my experiments in vegan baking I was learning a lot, but not really experimenting. So I pulled out the recipe, and looked at what substitutions I would have to make to veganize it - my first attempt at veganizing a recipe on my own. Exciting new territory.

Looking at the recipe for the first time in a few years, I was pleased to see that I would only have to make two substitutions from the original. Vegan margarine in place of the butter, and then something to replace the two eggs. Thinking back to what I've baked over the year, what I had on hand, and what I thought would fit the original recipe, I decided to try two variations, one with Ener-G Egg Replacer, and the other with flax-seeds to replace the egg.

For the trial I used two identical, recyclable 8" square aluminum pans, using Pam cooking spray to grease them. I chopped all the cherries and dates for both batches (luckily I had bought pre-chopped walnuts), then made my two egg replacers, mixing each with warm water. I then measured out the other ingredients into two bowls, and added the egg replacers, and mixed the batter, adding the yummy chopped bits from earlier last, per the recipe.

2 sets of ingredients, ready for mixing


Flax-seed batter on the left, Ener-G egg replacer on the right
I poured the batter immediately into the two pans, and put the pans side by side in the preheated oven, each pan on a cookie sheet to provide extra support. The recipe said to let the fruit bars cook for 45 minutes at 350. I set the timer for 35 minutes and cleaned up. Neither batch looked "done" at 35 minutes, so I came back at 40. The flax-seed batter had firmed up, but the batch that had the egg-replacer was still bubbly, so I left it in for the other 5 minutes.

Finished Flax-Seed batterFinished Ener-G Egg Replacer batter
I let both batches cool, and then cut them into smaller piece than was ever allowed in my house, rolling each in sugar. A few cherries and nuts were lost in the process, but both sets of bars seemed to hold together pretty well. All that was left was the taste test.

Sugar added- Flax seed left; Ener-G right


Luckily I have eager friends and co-workers. Members from my writing group preferred the flax-seed to egg-replacer 2-1. One girl who liked the flax-seed one better said she liked them because they were more moist, and complained that the one made with egg-replacer tasted like "flour and brown sugar".

At work, 2 could discern no difference, and 2 loved the flax seed option. One last opinion from family weighed in on the side of the egg-replacer version, though she admitted to wanting the flax-seed one to be better (she was the only one who went into the tasting "blind", not knowing which sample was which), and was surprised when she picked the egg-replacer one.

I also liked the flax-seed variation better, also because it was more moist – but I know that part of this could be the extra 5 minutes that the egg-replacer batter stayed in the oven.

Yummy - Flax seed mixAlso yummy, but fewer votes, Ener-G

Overall, the votes went 5-2-2 – Flax, Egg-replacer, no-difference.

I made the recipe again, a few days later, to give to another set of co-workers. I had exhausted my supply of recyclable pans, so I used my regular square pan, a 9" glass one. I use margerine to grease the dish. That night I saw firsthand the difference that different pan materials can cause.

These flax-seed variety fruit bars had a lot less sticking power. When they were cool and sliced, I began to remove the first bar to roll in sugar, it almost fell apart in my hand, and overall this batch lost a lot more of the confetti of goodies that make these treats what the are. I took to pressing each bar together before gently rolling them in sugar (well, more gently than the previous two batches). The held together okay, but rather than being moist, the bars seemed to skirt the edge of gooey.

This was definitely a learning experience, and I look forward to trying these again in a few days, make a veganized batch of these holiday classics for my mom, to see what she thinks.


Vegan Holiday Fruit Bars
2 TBSP ground flax seeds
6 TBSP warm water
1 cup sugar
2/3 cups all purpose white flour
1 tsp baking powder
1/4 tsp salt
1/2 cup nonhydrogenated margarine
1 tsp pure vanilla extract
1 cup candied cherries, halved
1 cup chopped, pitted dates
1 cup chopped nuts
granulated sugar


1. Preheat oven to 350ºF.
2. Grease 9" square metal pan.
3. In a small bowl mix flax seeds and water until well blended. Set aside.
4. In a large mixing bowl, combine sugar, flour, baking powder and salt.
5. Fold in margarine, vanilla and the flax-seed mixture. Blend well.
6. Add nuts, cherries and dates, mix until covered by batter.
7. Pour into a well-greased 9" square pan and bake at 350 degrees for 42-45 minutes.
8. Remove from oven, and place on a wire rack and let cool completely.
9.Once cool, cut into 16 squares. Roll each square in granulated sugar.


New tools/ ingredients:  Candied Cherries, Dates,
Recipe used: My own variation of my mom's Holiday Fruit Bar recipe
Co-baker: solo-mission
Date: Dec. 6-15, 2010

Saturday, September 18, 2010

Solo Mission: Chocolate Cake and Butter Cream Frosting Aug. 24, 2010

Tuesday night was a homework night. As soon as I got home, I settled in to reading from my Marketing textbook, taking a brief break to eat and put laundry in the machine.

As I finished my second hour with the book, I had the vision of myself in the kitchen, baking. So when I reached a natural stopping point in the reading, I headed there and pulled out The Joy of Vegan Baking.

I flipped through breads, first, but none caught my interest. Cakes/cupcakes was next, and the first recipe there was for chocolate cake. I skipped the ingredients, determined I had all of them on hand, then found the buttercream frosting recipe - ingredients I also had. Bingo.

Now, I wasn’t particular about what i was baking - another cake, or another kind of treat would have been fine - it just had to be something I didn’t have to go to the store for. The draw for me wasn’t the end product, it was the actual baking process.

The recipe promised to be one of the easiest cake recipe. Literally. “This chocolate cake might be the easiest cake in the world to prepare,” (pg 72).

It reminded me of the Mile High Chocolate Cake recipe we had tried earlier- though I used a mixing bowl instead of mixing directly in the cake pan.

I mixed in the dry ingredients with a fork, an when I was measuring the liquid ingredients into a well pressed into the dry mix, I added the vinegar last, and mixed the ingredients. The vinegar reacted with the baking soda, lightening the mix. Not having a 9" cake pan the recipe called for, I poured the batter into an 8” round dark metal cake pan. Like adding the vinegar in last, another trick I’ve picked up along the way is to force the bubbles out of the batter by dropping the cake pan on the counter a few times from about 1/2 an inch up. That done, I put the cake in the middle of the middle rack of my oven, and set the timer for 25 minutes.

While the cake baked, I measured out 1/2 cup non-dairy butter into a metal mixing bowl and put it on the back of the stove - near where some of the heat from the oven vents - to soften the butter.

The most time-consuming part of this confection was sifting 2 cups of confectioner’s sugar for the frosting. I was also a hesitant to pull out a hand mixer, but realized there was no way I’d get fluffy frosting by mixing by hand.


I love how the frosting swirls


I checked the cake at 25 minutes, I don’t know if it was because it was a dark metal, or an 8 inch pan, but toothpicks came out clean even though it was five minutes shy of the time in the cookbook. I am also glad I added the cake pan wrapper on as the edges first still a little low compared to center.

I left the cake cool, covered the icing, and put it in the fridge. I pulled it out again after about 10-15 minutes.
Cake cooling


One of the easiest frosting jobs ever
When I went to ice the cake I was pleasantly surprised with how the frosting spread. It seemed  a little less thick than commercial frostings I’d bought in the past (harder to get a cohesive blob on my spatula) but it spread nicely. Also, it did not pick up chocolate flecks from the cake and mix it in with the white icing, as happened with my last cake (made from commercial mix with store-bought frosting.) Now I am sure this was due to a a combination of things -- not one magic secret -- I was icing the top of the cake for instance, not the bottom; I used oil in the pan (not shortening); the frosting was slightly chilled, not room temperature; and the consistency of the frosting was different.


As for taste, the cake was moist and decadent. The frosting, my sister said, smelled astringent but tasted wonderful. She suggested perhaps rosewater as an addition to the frosting (something I’ll have to experiment with) or or food coloring. And I need practice getting a smooth spread of frosting on the cake, but there are classes for that. 

Moist cake and yummy frosting


I took the cake in to work the next day, and it was a welcome treat. My co-workers said that the frosting tasted just like they expected buttercream frosting to taste like, so I score what started out as a diversion from homework a success.

New tools/ ingredients:  none
Recipes used: Chocolate Cake from The Joy of Vegan Baking pg 72 ; Buttercream Frosting from The Joy of Vegan Baking pg 231
Co-baker: solo-mission
Date: Aug. 24, 2010

Thursday, July 29, 2010

Solo Mission: Chocolate Snickerdoodle Cookies - July 27, 2010

Well, I have not baked in a while. I am enrolled in a business certificate program at a local college, and my focus lately has been on classwork. The other day I discovered I had some free time and I was itching to flex my baking muscles once again. Cookies would be easiest, I thought, so I grabbed Vegan Cookies Invade your Cookie Jar and started flipping through, skimming to find one calling for ingredients I had on hand.

When I got to the Mexican Hot Chocolate Snickerdoodles, I saw I was lacking only the chocolate extract and the cayenne pepper. Now, I am not a fan of spicy things, and would normally avoid anything “Mexican chocolate.” But I was making the treat and figured I would simply adapt the recipe to taste (and ingredients on hand) and make Chocolate Snickerdoodles minus the “Mexican.” After all, I do like chocolate.

I pulled out all the ingredients, and preheated the oven. I mixed sugar and cinnamon for the topping, and set it aside, next to my parchment paper covered cookie sheets.

Measuring the wet ingredients I was dismayed to find that I had less maple syrup than the recipe called for, and wondered what I should do to make up the missing volume, if anything. Since I am still relatively new to baking I wasn’t sure what could be an appropriate substitute, and I looked through my pantry for ideas. Shuffling aside the peanut butter, I was thrilled to find a small, personal serving size jar (1.7 oz) of Pure Maple Syrup that I had squirreled away from a pancake breakfast ordered on vacation at a resort months ago. It’s probably not a great thing that my hoarding tenancies were justified, but I was grateful for the find.

I went back to measuring. In lieu of the chocolate extract I used extra vanilla extract, as noted in the recipe. I do have to admit, though, when I first read the ingredient list, I thought “Chocolate extract? Such a thing exists?” I look forward to finding this, and adding it to my pantry.

Since I was leaving out the cayenne pepper, I toyed with the idea of finding a different spice to add to the batter, but my culinary skills (and stocked kitchen) are still nascent I did not feel comfortable making a decision of an alternate spice. I briefly pondered cloves or nutmeg - all my other spices are more savory in nature, which, in my mind, eliminated them from contention. Now that I think on it, I would have been replacing a pepper, so perhaps I should rethink that hard-line mental distinction. Rather than chance ruining the cookies, I ended up using a generously heaping teaspoon of cinnamon instead of a carefully measured one.

the dough was easy to work with

I mixed the ingredients, and was pleased with how easy the dough was to work with. As the recipe promised, the flattened cookies stuck nicely to my fingers after pressing them into the sugary topping, making for easy transition to the cookie sheet. I did discover that this trick only works after you press the cookies - if you stop after, to take a picture, for example, the cookies lose that damp stickiness and you need to find another way to move them (let’s just say my butter knife served me well).

With regards to the cinnamon and sugar topping, I found that what the recipe called for was more than enough. I ended up saving the unused portion - almost half of the mix.

cinnamon and sugar topping
onto the cookie sheet


I put the first sheet of cookies in the oven and began to clean up. I started the timer with 8 minutes (the recipe calls for 10-12, but I wanted a chance to check the progress and decide whether to give it the full time). With 3 minutes left on the timer, my cat noticed a bird that had gotten trapped on our back patio. I went out on a quick rescue operation, and when I came in, the timer was beeping - I wasn’t sure if it had just started, or had been going a while. I went ahead and added another 2 minutes to the timer.

unbaked cookies
The second batch of cookies went in for a more precisely measured (that is uninterrupted) 10 minutes. Even warm, the cookies were a bit crisp on the outside, but softer in the middle.

I shared the cookies with some of my spice-loving friends and though they liked them, the vote is they would be better with the cayenne. I have had cookies for breakfast the past couple of days and noticed two things 1) like with most of the recipes we’ve tried, they taste better a day after baking and  2) they are a little bit oily - I carried them to work this morning wrapped in a paper towel, which soaked up oil during the 20 minute drive.

I have a few ideas for the next time I make these cookies. I may bake a batch for 8 minutes, and see if I can get a softer cookie. I may try to find a substitute for some of the oil, or reduce the amount the recipe calls for by a bit. Finally, I may get brave, have a glass of milk on hand to help defray the heat of the spice, and actually add the cayenne pepper.

All in all though, I think this was a good cookie.  

Delicious


New tools / ingredients: (chocolate extract / Cayenne powder)
Recipe used: Mexican Hot Chocolate Snickerdoodle - Vegan Cookies Invade your Cookie Jar
Co-baker: Solo-Mission
Date: July 27, 2010